WellSCAN User Manual
This manual explains how to use the WellSCAN website and tools, and how they connect to the Healthy Eating Research (HER) guidelines.
You can skim the sections using the navigation on the left, or scroll through the full guide below.
Background
The WellSCAN is a suite of digital tools and products made to help food banks and food pantries better identify, rank, and log the nutritional quality of their inventory. This guide serves as an introduction to the WellSCAN's global nutrition database, calculator, and inventory tool.
WellSCAN was created by the UConn Rudd Center for Food Policy and Health based on the latest nutrition guidance from Healthy Eating Research. The website and inventory tool are housed, licensed, and serviced by the University of Connecticut Institutional Insights & Innovation Team. This project has been made possible by support from Healthy Eating Research, Partnership for a Healthier America, Feeding America, and The Claneil Foundation.
To learn more about implementing WellSCAN at your organization, please contact us.
Understanding the Healthy Eating Research Guidelines
In 2019, Healthy Eating Research convened a panel of experts in the charitable food system, nutrition, and food policy fields to create clear, specific recommendations for evidence-based nutrition guidelines tailored to the unique needs and capacity of the charitable food system. The intent of these recommendations is to improve the quality of foods in food banks and pantries to increase access to and promote healthier food choices across the charitable food system, allowing all people in the United States—regardless of income—access to the foods necessary for an active, healthy life.
Under the HER Guidelines, Products are divided into 11 categories: Fruits and Vegetables, Grains, Protein, Dairy, Non-Dairy Alternatives, Beverages, Mixed Dishes, Processed and Packaged Snacks, Desserts, Condiments and Cooking Staples, and Miscellaneous Products. Within these categories, items are ranked into tiers of "choose often"(green), "choose sometimes" (yellow), and "choose rarely" (red) based on thresholds for saturated fat, sodium, and added sugar. The expert panel chose to focus primarily on these three nutrients based on evidence linking increased consumption to risk for diet-related chronic diseases, including obesity, diabetes, hypertension, and cardiovascular disease. The current thresholds apply to the amounts found in a single serving of food. Anchoring the guidelines to serving size allows straightforward identification of necessary information on the Nutrition Facts Label and should make the system easier to implement.
More information about the HER Guidelines, including a suite of resources to help partners understand and implement the Guidelines in their organizations, can be found on the Rudd Center's HER Guidelines webpage .
How to Navigate WellSCAN
Step 1: Visit the homepage
- Navigate to wellscan.io in your device's browser.
- WellSCAN can be accessed on both your computer and your phone
- On the homepage, you will find information about the WellSCAN suite, quick links to all of the tools on the site, and our contact information

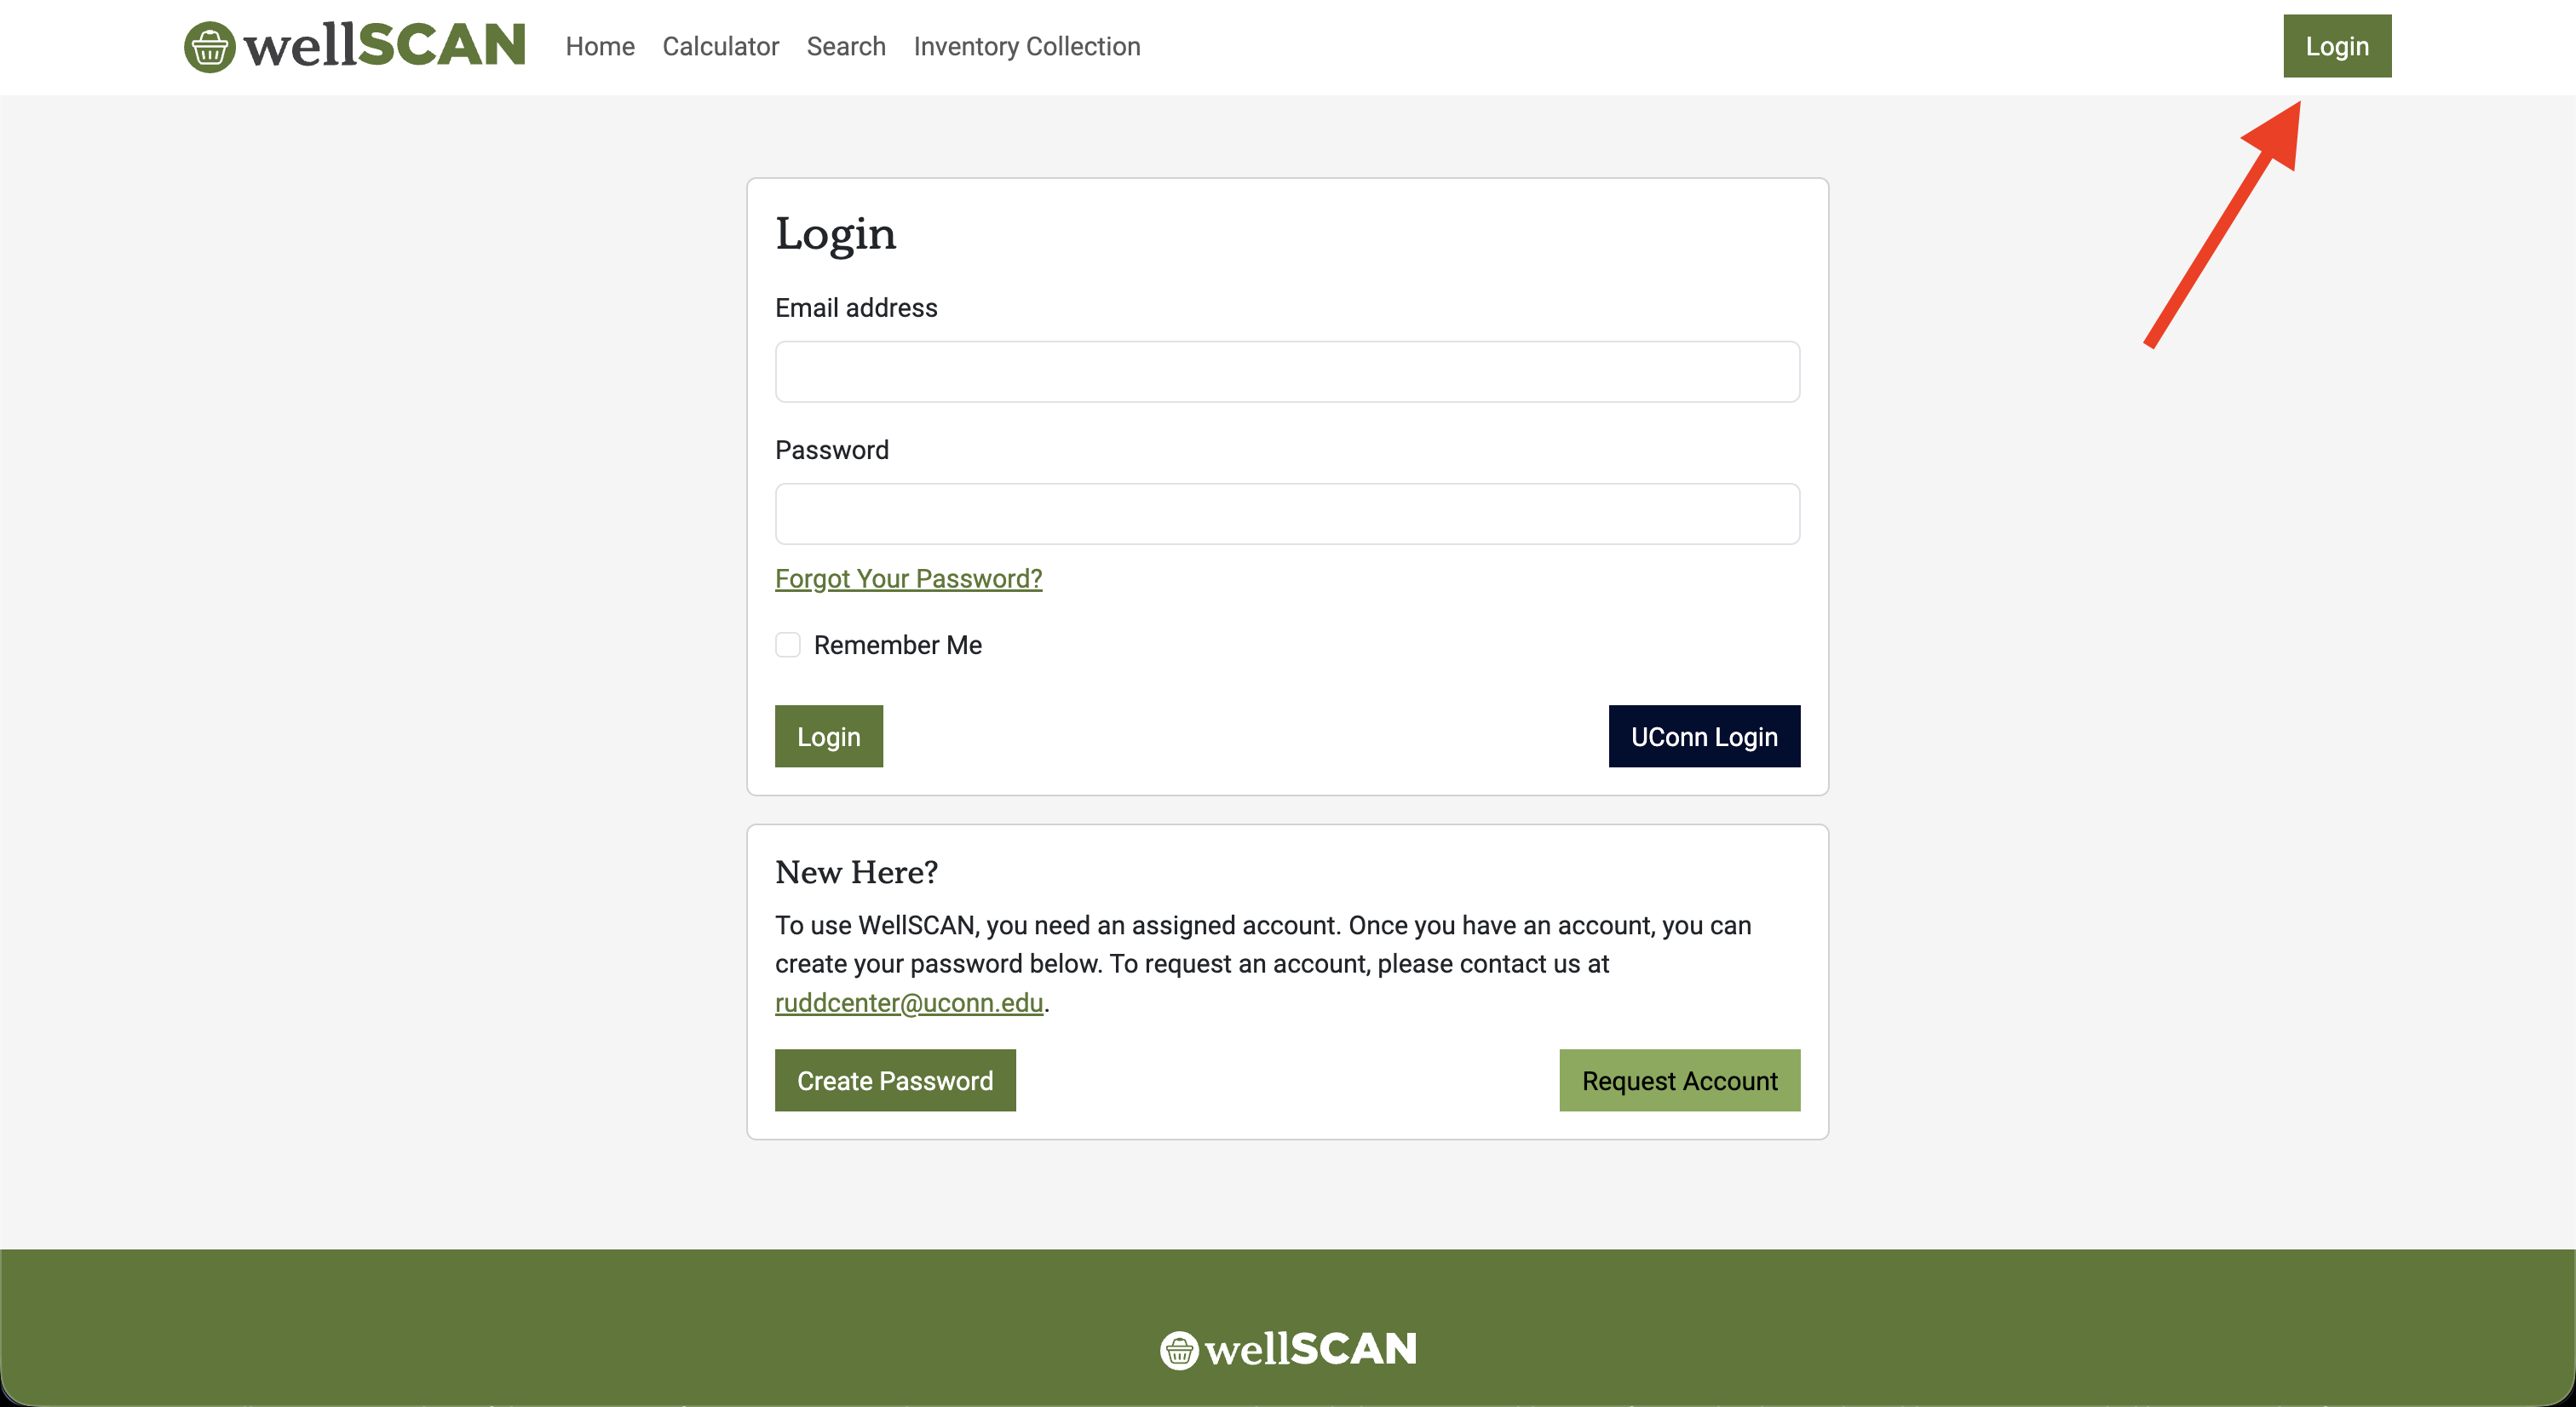
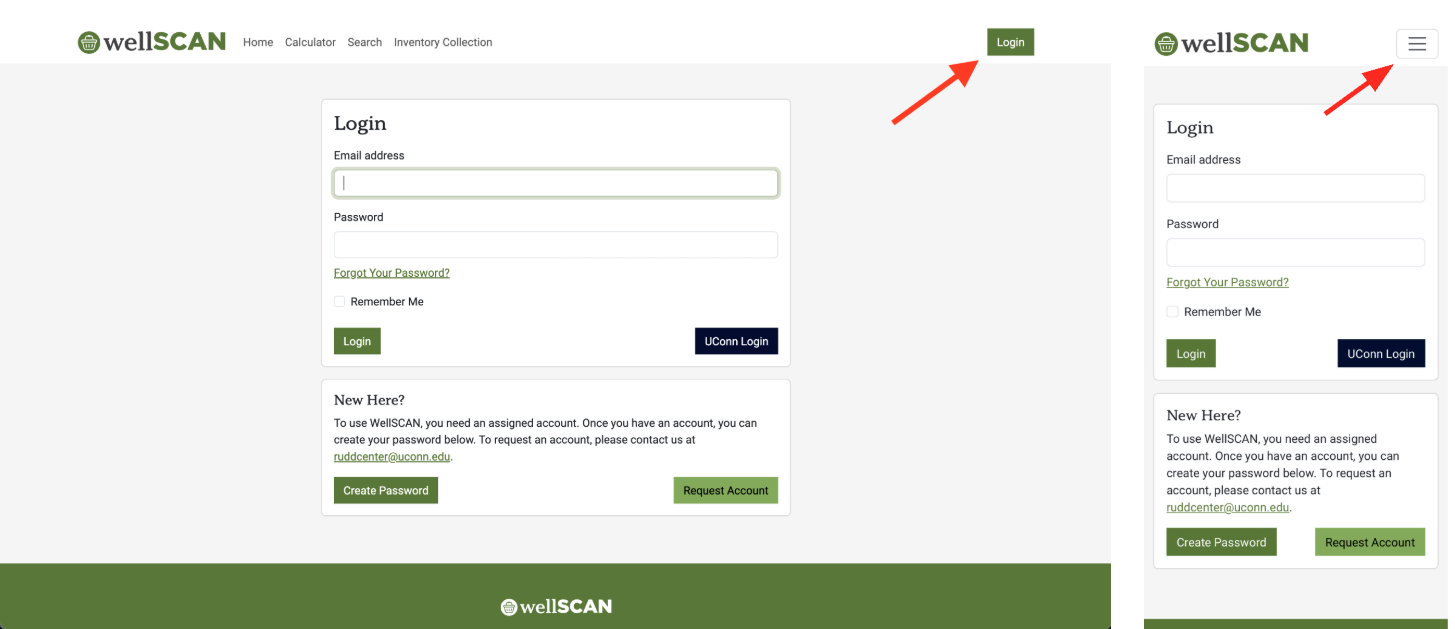
Step 2: Log in
- The Login button can be found at the top right corner of your screen
- If you are already registered as a user, enter your email address and password
- If you are affiliated with UConn, you can click the Husky Blue "UConn Login" button and use your UConn information to access the site
- If you are not affiliated with UConn, and if you are new to WellSCAN, find the "New Here?" prompt and follow the instructions to request an account
How to Use the WellSCAN Calculator
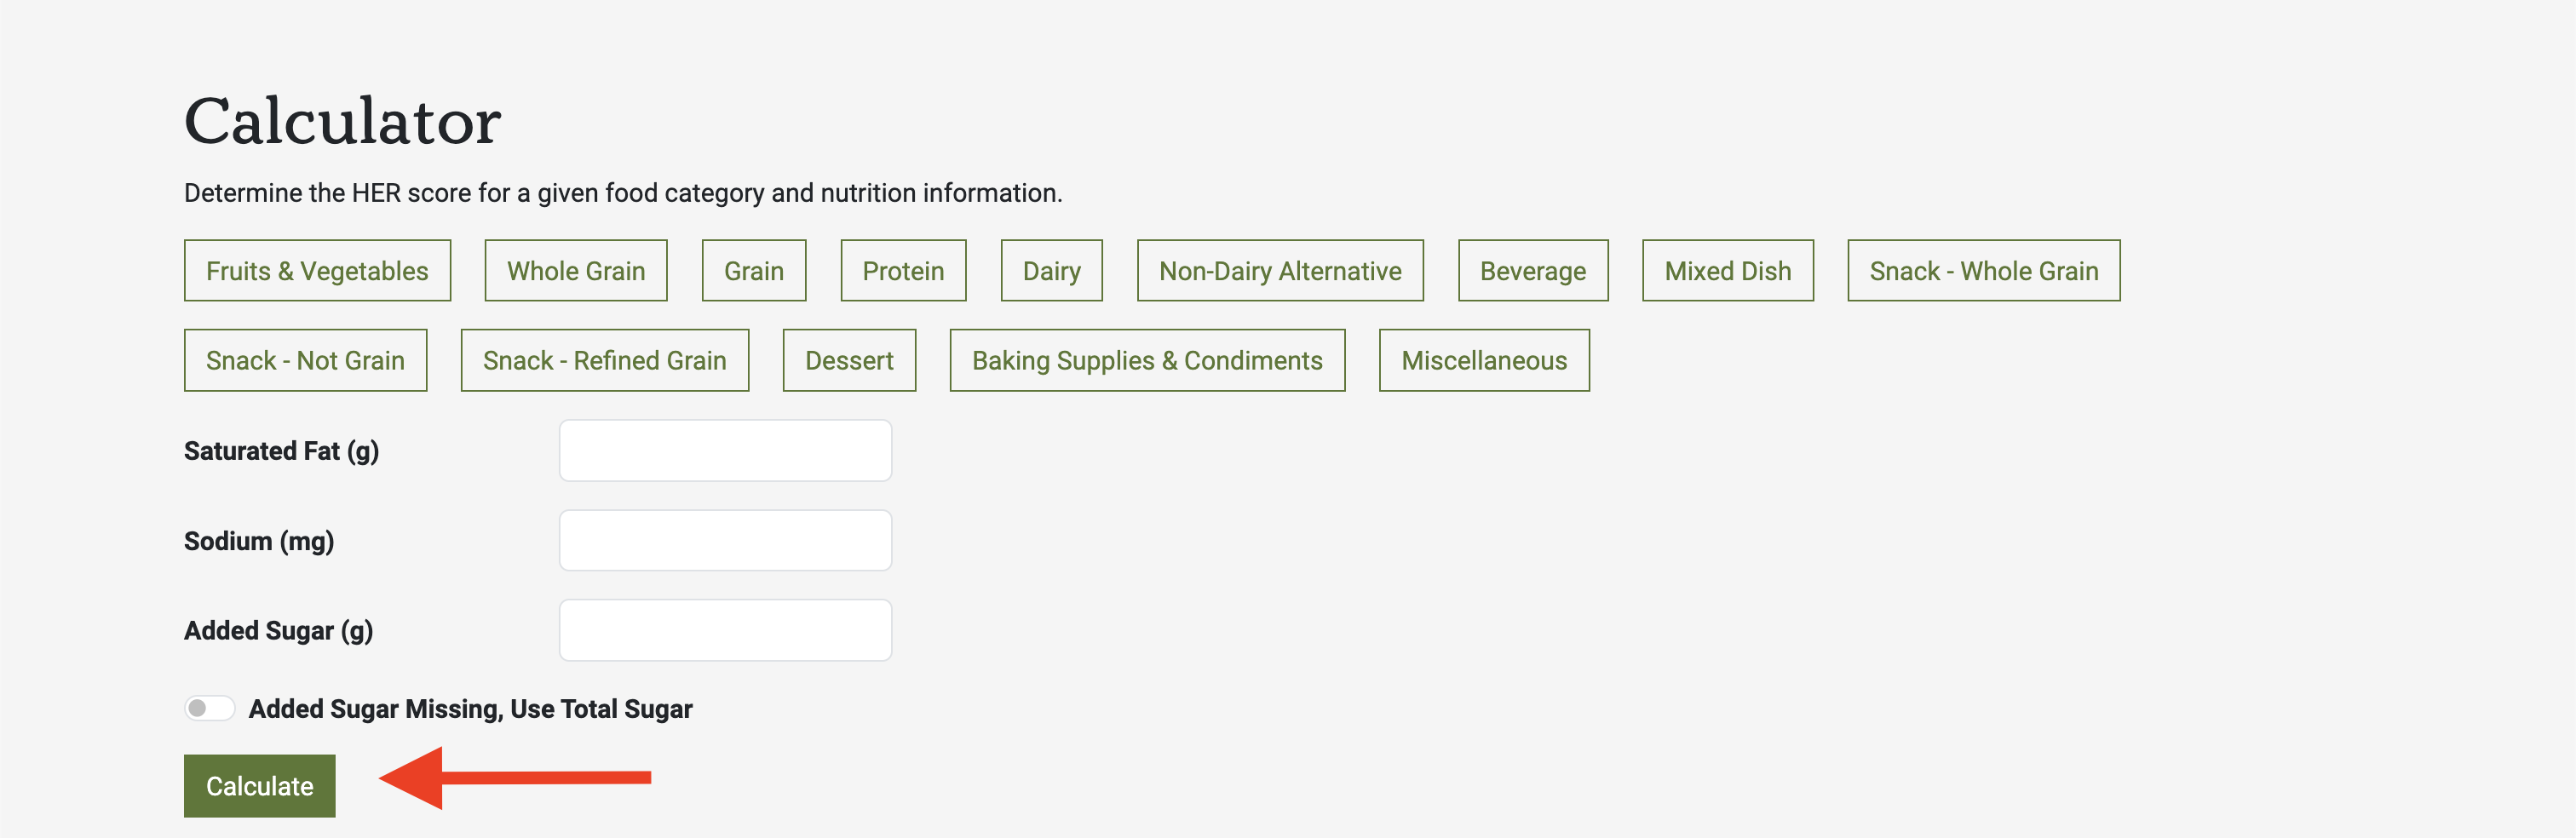
Step 1: Access the calculator from the top menu of the website
- The calculator can be used to determine the HER score for a given food category using the nutrition information
- This feature can be accessed without being logged into the site

Step 2: Select the food category of the product you are looking up
- There are 14 options to choose from. These match the 11 HER Nutrition Guidelines categories, and divide the Snack and Grain categories as follows:
- Grain vs. Whole Grain: Use "Whole Grain" when the first ingredient is a whole grain. Otherwise, use "Grain".
- Three Snack categories:
- Snack – Not Grain: first ingredient is not a grain.
- Snack – Whole Grain: grain-based snack with a whole grain as the first ingredient.
- Snack – Refined Grain: grain-based snack with a non–whole grain as the first ingredient.

Step 3: Enter nutrition information
- Enter the grams of saturated fat, the milligrams of sodium, and the grams of added sugars in the product
- If the added sugars information is not available, you can input total sugars instead. Make sure the total sugars slider is selected for accurate results
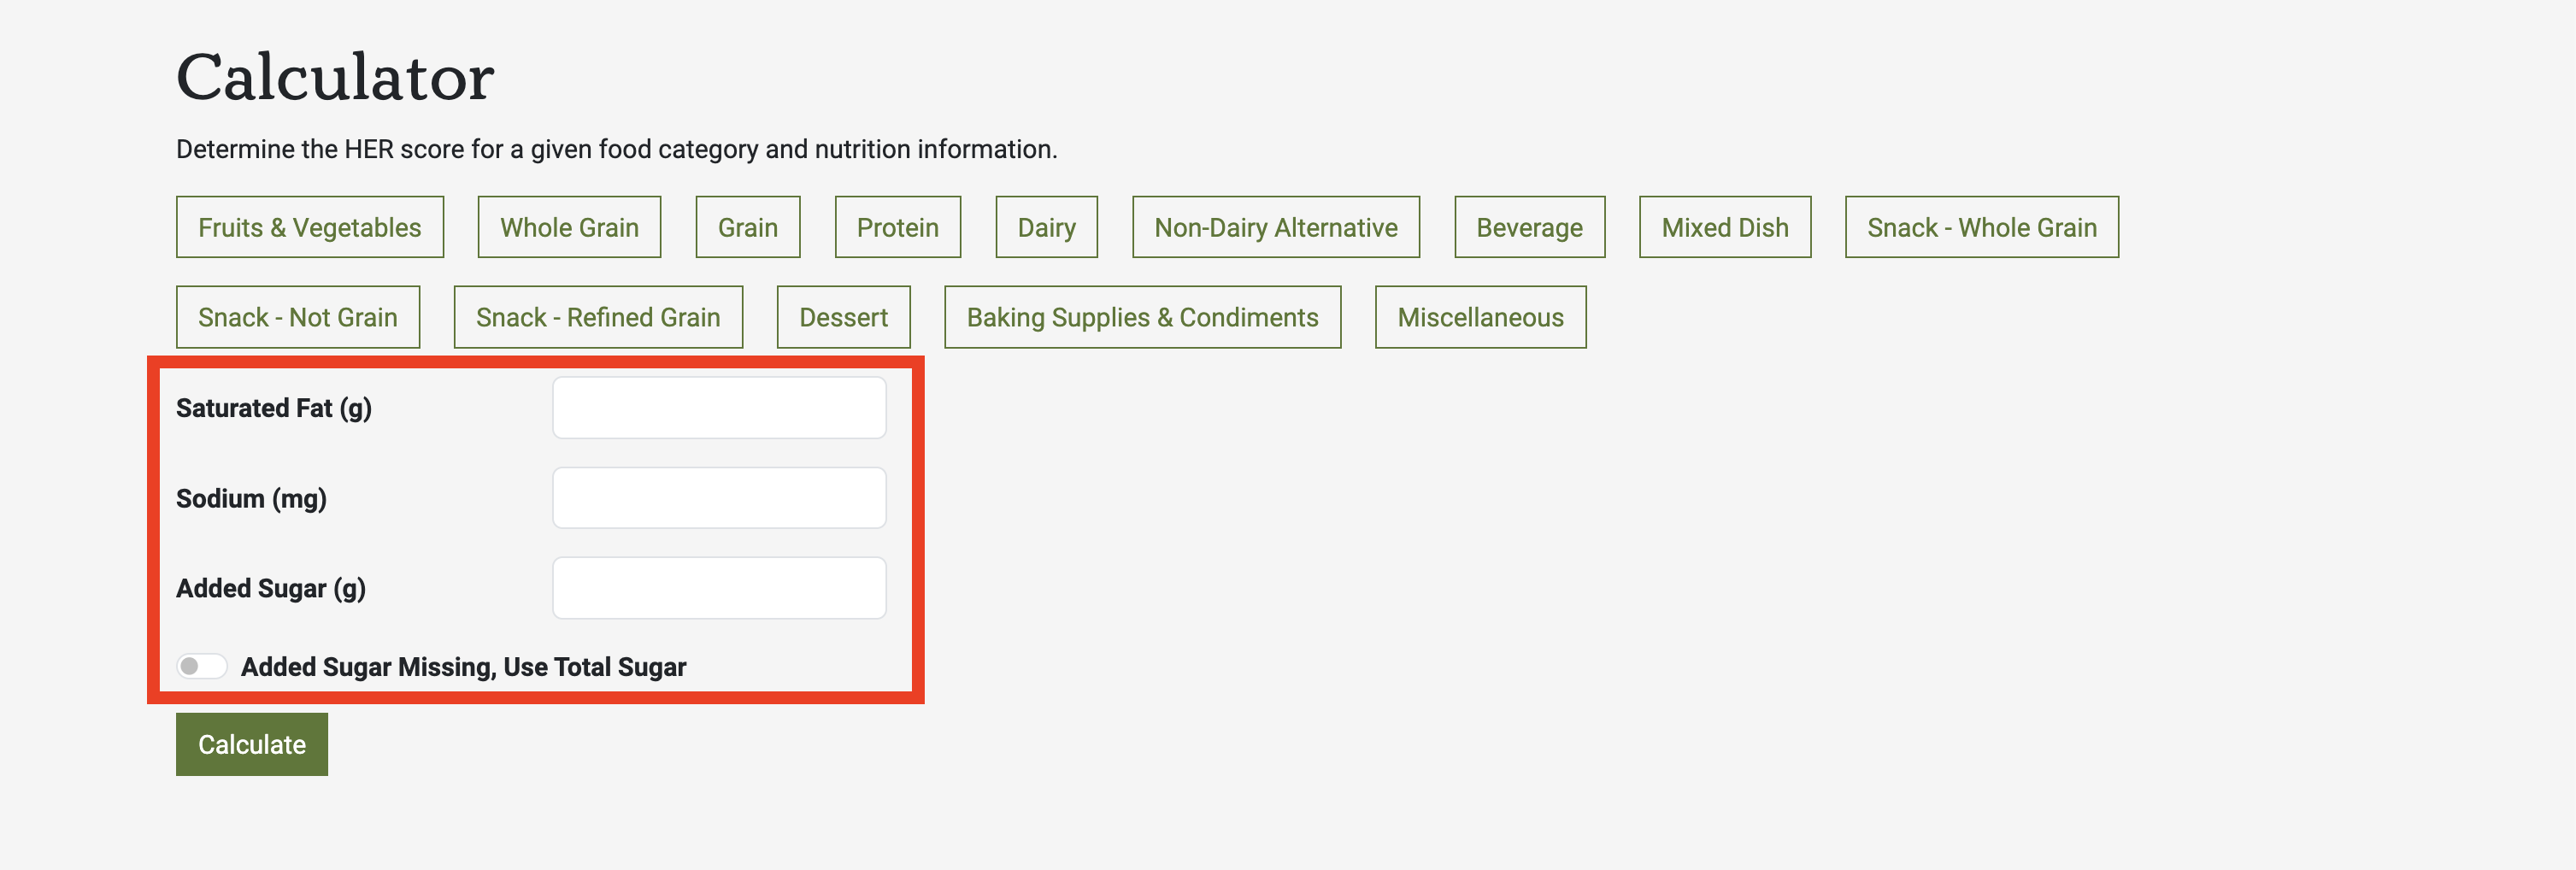
Step 4: Calculate the rank
- Click the green Calculate button.
- The calculator returns an HER rank of Choose Often, Choose Sometimes, or Choose Rarely.
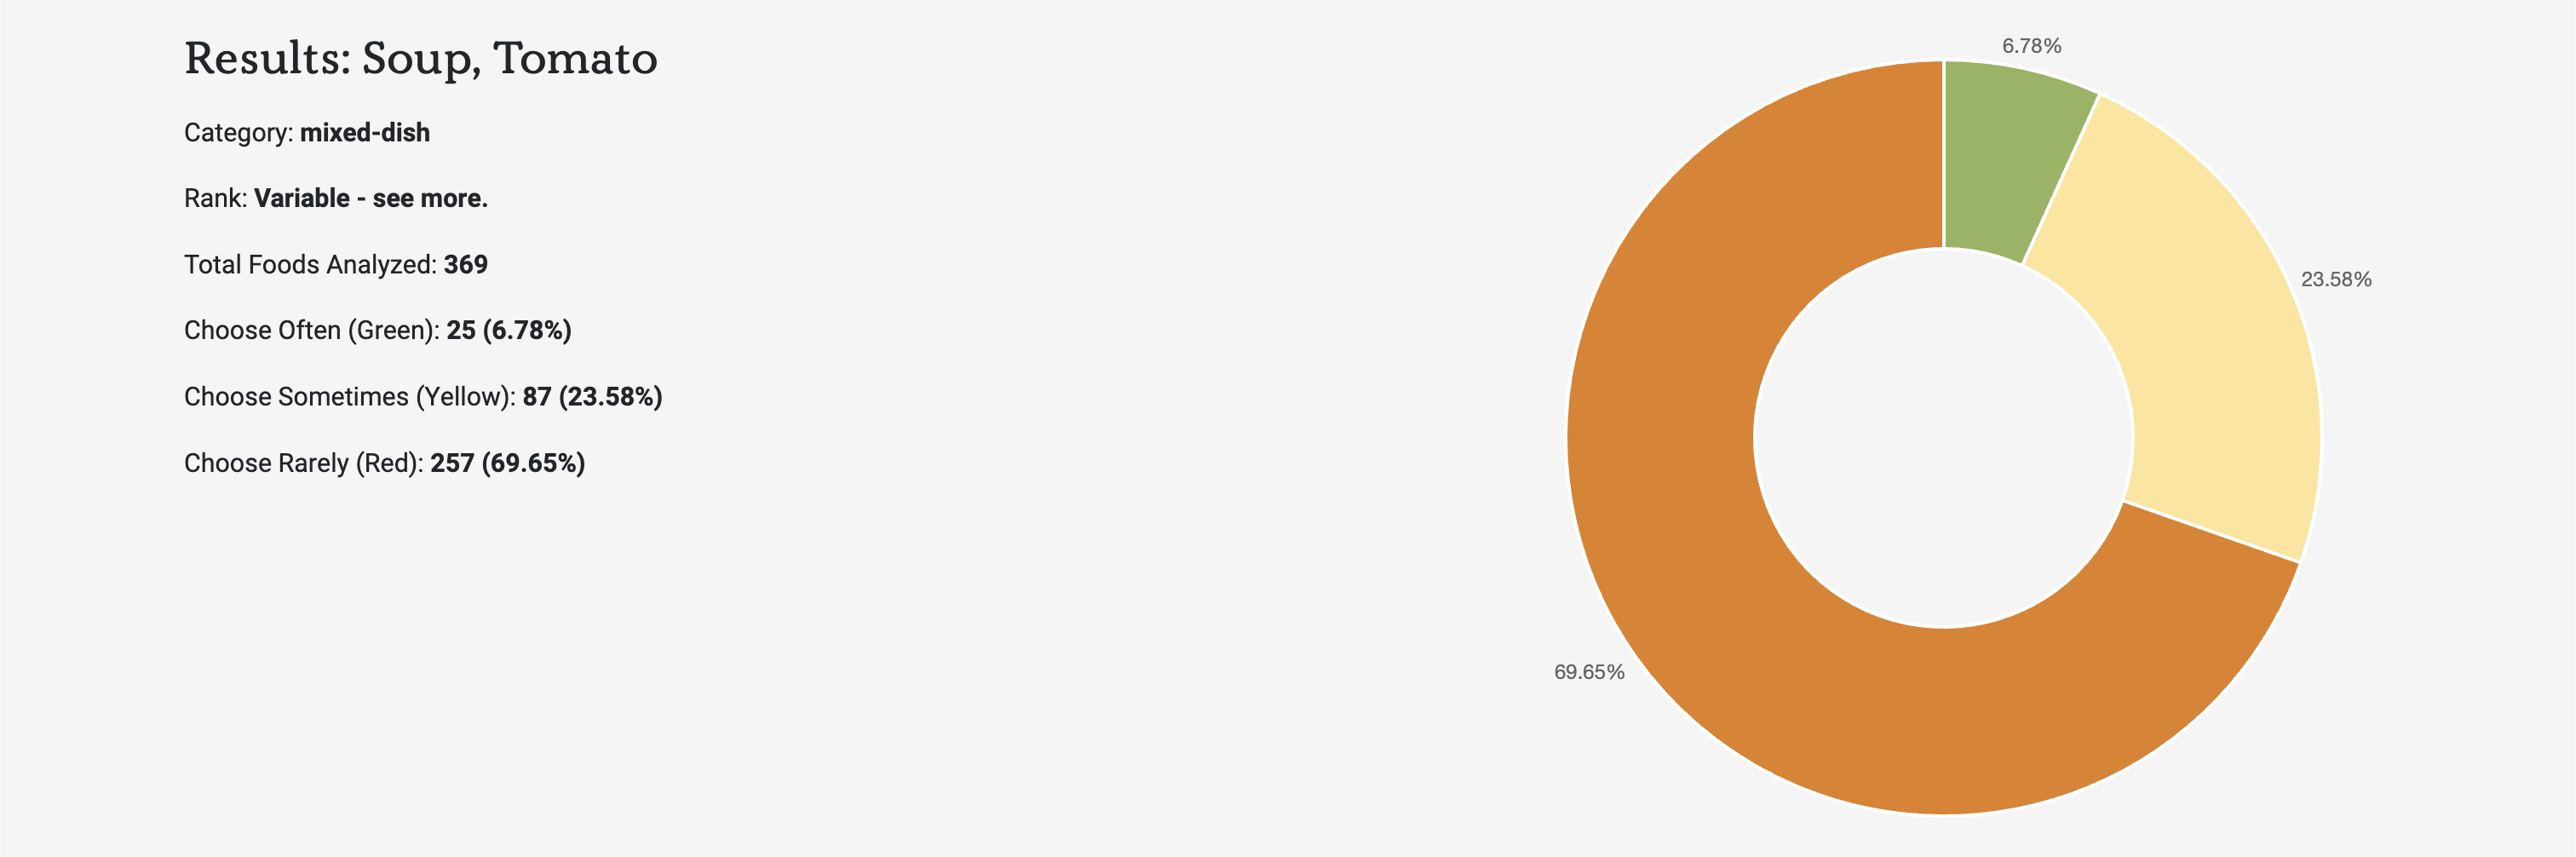
How to Use the WellSCAN Search Tool
Step 1: Access the search tool from the top menu of the website
- The search tool can be used to lookup the category and HER rank for a common and UPC-specific foods
- This feature can be accessed without being logged into the site.

Step 2: Search for a food category, UPC, name, or other
- Enter the product information in the search bar
- You can also choose to search for items only available through USDA Food Programs (TEFAP, CSFP, and FDPIR)
- You can also select if you would like to filter results by Category or HER Rank.
- Then, click the green "Search" button.

Step 3: Select the product you would like to view
- If you enter a UPC, names of products with that UPC will appear.
- If you entered a food category, the information will be presented as an item card category that describes the nutrition ranking of foods from that category that have been analyzed.

Tips for Data Collection
- WellSCAN can be utilized on both computers and mobile devices. However, we recommend using a mobile device with a camera for data collection. Editing and adjusting your inventory post-collection is easiest on a computer.
- When taking photos, be diligent about focusing the camera to take clear photos (watch out for glare). This will help during post-collection when going through the entries and filling in missing details.
- After data collection, you can use a computer to add missing information to all records. This will save time during data collection.
- To quickly access the tool on-the-go, you can add a WellSCAN icon to your mobile device's Home Screen. Go to wellscan.io on your preferred browser (Google Chrome or Safari are preferred) and click the "Share" icon. On the popup that appears, select "Add to Home Screen." Finally, input "WellSCAN" as the icon title and click the "Add" button.
How to Use the WellSCAN Inventory Collection Tool
Common WellSCAN Inventory Collection Terms
- Organization: All of the people working on the same team. For instance, all team members at a specific food pantry who will be using WellSCAN should be added to the same organization.
- Users: Individuals who will be using WellSCAN to collect data. They should all be affiliated with an organization.
- Sites: The specific location at which you are collecting data. This is often a specific food pantry.
- Waves: The series of items logged by an individual/team on a particular date.
Step 1: Sign in to WellSCAN
- Visit wellscan.io on a computer or mobile device and sign in to your account.
- If you are using a computer, the login button can be found at the top right corner of your screen. If you are using a mobile device, click the three horizontal lines in the top right corner of your screen. Then you will see the login button.
- If you are already registered as a user, enter your email address and password
- If you are affiliated with UConn, click the Husky Blue "UConn Login" button to access the site. If you are not affiliated with UConn, and if you are new to WellSCAN, find the "New Here?" prompt and follow the instructions to create an account
Step 2: Select "Inventory Collection" from the top menu.
- On this page, you will see a list of all items that you (or your team) have logged.
- If you have been added to an organization (e.g., a research team or a food bank/pantry staff group), you can switch between your personal inventory and your organization's inventory.

Step 3: Prior to data collection, create/manage your Sites and Waves.
- Select the "Sites & Waves" tab. Here you can enter the site name, location, and wave (this is often the date)
- To manage previously created Site & Waves select the "Actions" drop-down option. Then you can choose "Select for Collection," "Edit," or "Remove"

Step 4: Start a new inventory collection
- To start a new data collection, click the "+ Start Inventory Collection" button under the Inventory tab
- On the popup window that appears, enter the site and wave of your current session. Then click the "Start Collection" button
- If you have not created a site or wave yet, you can select the "Manage Sites & Waves" button at the bottom of the pop-up box to access the Sites & Waves tab

Step 5: Begin collection
- There are two methods for collecting data: scanning barcodes and typing in product information.
- We recommend that data collection is done on a mobile device with a camera.
Step 6: Scan the barcode for each item.
- Selecting the "Scan" button will open the camera. If using a mobile device, you will have to allow camera access.
- Items will scan automatically when you point the WellSCAN camera at a barcode.
- If the item is already in the WellSCAN database, the item's information will manually populate. If there are multiple items that have this barcode, you will have to select which option best matches the item you are trying to input.

Step 7: Add or adjust item details
- If the barcode is not recognized and no results are found, then select "+ Add More Photos". Then, take clear pictures of the front label, the nutritional label, and the ingredient list
- When taking photos, be diligent about focusing the camera to take clear photos (watch out for glare). This will help during post-collection when going through the entries and filling in missing details.
- If you want to enter the item's nutritional information on-site, select "Add Details".

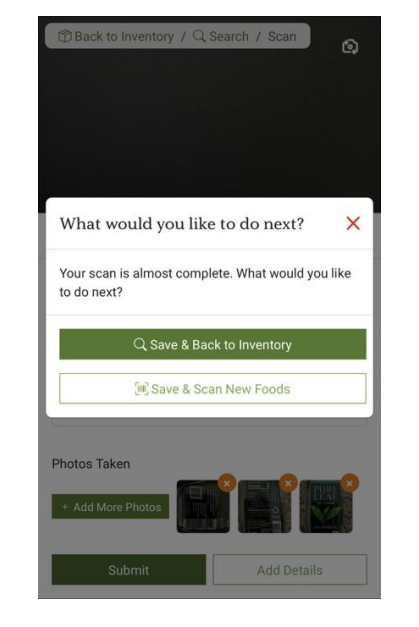
Step 8: Submit picture and move onto the next item
- When you submit your photos for each item, a prompt will pop up with two options.
- If you want to end inventory collecting, select "Save & Back to Inventory." If you want to continue inventory collecting, select "Save & Scan New Foods".
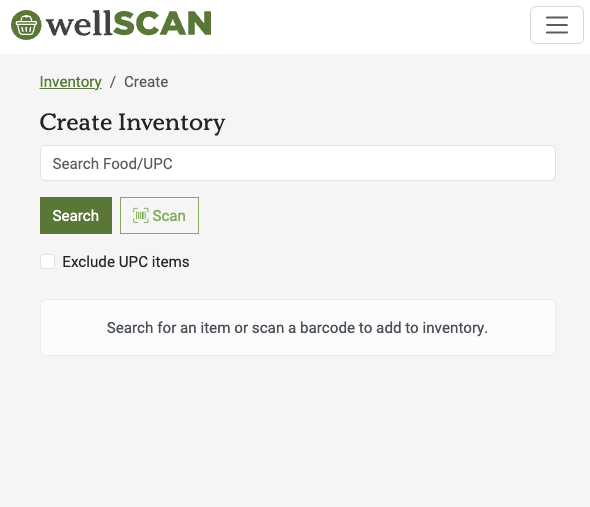
Step 9: To add inventory manually, use the search bar to type in the name of the food.
- If you are logging fresh produce, you can type the name into the search bar. You will be able to select that item from the database and add it to your log. (Note: all fresh produce is green!)
- The search function is identical to the Search tool that can be used without logging into the site (see "How to Use the WellSCAN Search Tool" for more details).
- If the item is not found in the database, you can manually add it. Press the scan button. This will open your phone's camera so you can take a picture of the product's front label. Then, click on "Details" to select category, add more pictures, and submit the product. You will be able to add additional details post-collection.
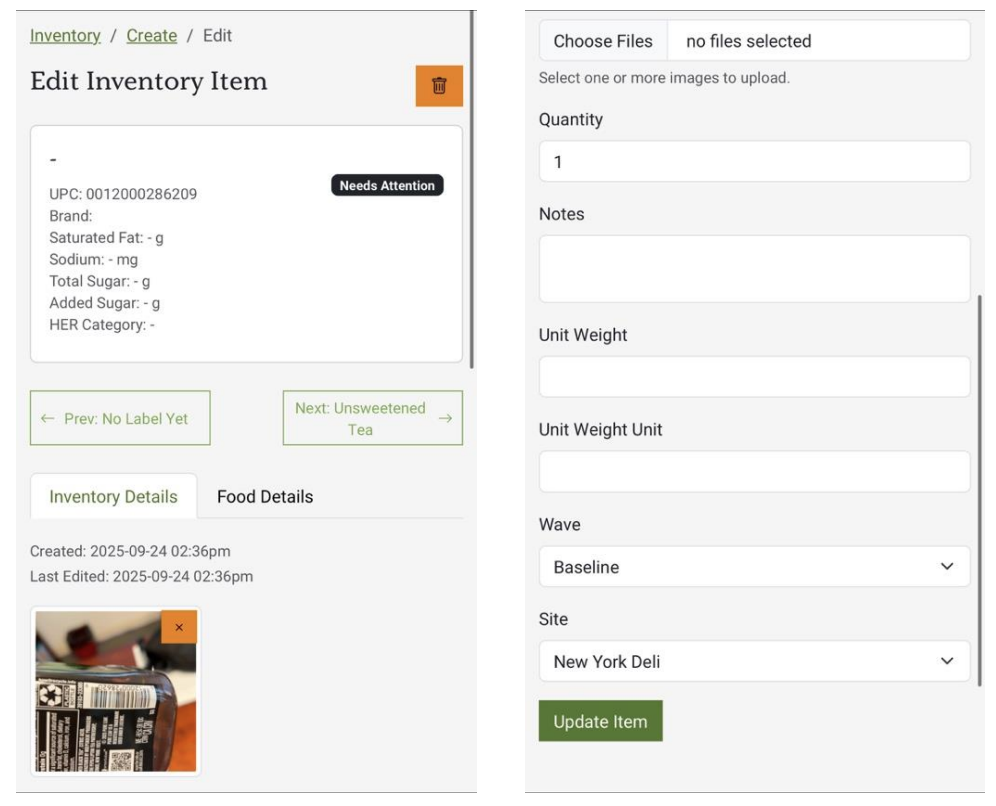
Step 10: After data collection, review and edit your inventory
- We recommend reviewing and editing your inventory on a desktop compared to a phone.
- On the Inventory page, you can filter by site, wave, item name, date, and/or user. You can also choose to filter by newest item scanned or last item scanned
- You can edit individual items by clicking on the item and selecting "Food Details"
- Add details for the item by referencing the pictures that were uploaded during data collection. When done, select the "Update" button at the bottom of the screen
What Happens When You Scan an Item?
- If the UPC is found in the WellSCAN Global Database, the tool shows the item's HER rank (Green / Yellow / Red).
- If the UPC is not found in the WellSCAN Global Database, the app searches the USDA FoodData Central Branded Foods Database.
- If the item is found in the public database, the nutrition information will populate the WellSCAN record. However, the HER food category is not in the USDA's database. Thus, you will have to select the correct food category to complete the record.
- If the item is not found in the public database, follow the instructions for adding details manually (including photos and category selection).